Last updated November 18, 2026
Home Addition Contractor Maintenance Schedule: What to Do and When
The busiest season for water intrusion in a finished addition isn’t winter – it’s the first summer after the crew leaves. Expansion and contraction work every seam between new and old structure, and by July that caulk line you never looked at is doing more load-bearing than it should. Most homeowners get a walkthrough, a folder of appliance manuals, and no calendar. This guide fixes that. It’s the maintenance rhythm we hand our own clients in Boulder City, covering the first 90 days, the seasonal swings, and the exact moment a small gap stops being cosmetic.
Quick Answer
A new home addition needs a 30-60-90 day inspection cycle in the first three months, a full exterior seal check before each wet season, and an annual review of the roofline, wall connections, slab edges, and HVAC integration. In Boulder City, the critical windows are late spring (before monsoon moisture) and late fall (before the first hard freeze). Everything in year one is about catching movement early, while your 365-day workmanship warranty is still active.
Table of Contents
- The First 90 Days: Your 30-60-90 Inspection Checklist
- The Roofline Seam: The First Place Water Finds
- How Boulder City’s Temperature Swings Move Your Seams
- The Annual Maintenance Calendar, Season by Season
- What the 365-Day Warranty Covers (and What It Doesn’t)
- Normal Settling vs. a Structural Concern
- HVAC Integration: The Forgotten Maintenance Item
- Common Mistakes to Avoid
The First 90 Days: Your 30-60-90 Inspection Checklist
The first three months after a home addition is finished are when the new structure does most of its settling. Fresh lumber dries and shrinks. Concrete cures. Caulk skins over and pulls back at the joints. None of this is failure – it’s physics. But it’s also the window where a five-dollar tube of sealant prevents a five-thousand-dollar drywall repair.
Day 30: The Settling Check
- Walk the perimeter and photograph every caulk joint at the new-to-old wall connection. A hairline crack at 30 days is expected. A gap wider than a credit card is not – photograph it and call your contractor.
- Check interior drywall corners where the addition meets the original house. Look for new cracks radiating from door frames and window corners.
- Open and close every new door and window. Sticking at 30 days usually means the frame is still moving; sticking past 60 days needs a look.
- Look at the floor transition where new slab or subfloor meets old. A small lip is normal. A visible step is not.
- Confirm the HVAC is holding the addition at the temperature you expect. Note any room that runs hotter or colder than the rest of the house.
Day 60 and Day 90: The Seal and Systems Check
By 60 days, the major settling has happened. Re-check the same caulk lines, look for any new flashing gaps at the roofline, and confirm your HVAC balance hasn’t drifted. At 90 days, do a full repeat of day 30 and compare photographs side by side. If the cracks have grown, that’s your signal to call. If they’ve stayed put, you’re in a normal cycle and the annual schedule below takes over. Every project we complete under the 365-Day Done Right Promise includes a free second visit if any element of the build fails – that’s what this window is for.
The Roofline Seam: The First Place Water Finds
The joint where a new addition meets your original roofline is the single highest-risk point on the entire structure. Two roof planes built years apart settle differently, and the flashing that bridges them – the metal that directs water away from the seam – is doing quiet, constant work. When it fails, water doesn’t announce itself. It travels along framing, soaks insulation, and shows up as a stain on interior drywall weeks later. By then the repair has grown.
In Boulder City, that risk peaks during monsoon season, when summer storms deliver fast, heavy rain in a short window. We’ve seen roofline seams that held perfectly for two dry seasons fail on the third storm because the sealant had shrunk thin in the heat. The fix at that stage is small. Ignored for another season, it reaches the sheathing.
What to Check at the Roofline Seam
- Flashing edges: Look for lifting, rust, or gaps where the metal meets shingle or tile. Any daylight or visible separation is a call-now item.
- Sealant beads: Run a finger along the caulk line. If it’s cracked, chalky, or peeling away from the surface, it needs renewal before the next wet season.
- Interior ceiling corner: Any discoloration, bubbling paint, or soft spot on the ceiling nearest the seam is water – even if you can’t find the entry point outside.
- Attic-side inspection: If you have attic access near the junction, look for staining on rafters or damp insulation after a heavy rain.
This is a binocular-and-eyes job for the roof itself. Get on a ladder only if you’re fully comfortable doing it – roof height is unforgiving, and a fall from a one-story eave is serious. When in doubt, have it looked at by someone who climbs roofs for a living. This is exactly the kind of connection point we walk clients through at the end of every home addition contractor in Boulder City project.
How Boulder City’s Temperature Swings Move Your Seams
Boulder City sits in a high desert basin, and that means the daily and seasonal temperature swings are wide. Winter nights drop near freezing. Summer afternoons push past 100°F. That range is the engine behind everything that happens at your addition’s seams.
Wood framing, stucco, siding, and sealant each expand and contract at different rates. At the connections between new and old structure, those differences create movement – tiny, repeated, cumulative. A caulk line rated for moderate swing will crack faster here than in a mild coastal climate. That’s why the maintenance schedule for a Boulder City addition is tighter than what a general guide from another region would tell you.
What Each Season Brings
- Late spring (May-June): The swing between cool nights and hot days is at its widest. Caulk that hardened over winter shows its first new cracks. This is your pre-monsoon inspection window.
- Monsoon (July-September): Fast, heavy rain tests every seal. Water intrusion shows up now or not at all. Check interior ceilings after the first big storm.
- Fall (October-November): The cooling cycle reverses the movement. Seams that opened in summer close slightly. Inspect and renew exterior sealant before the first freeze.
- Winter (December-February): Freeze-thaw cycles at night are hardest on exterior caulk and any trapped moisture. A crack that holds water and then freezes widens fast.
This is why we tell clients to treat the seam maintenance as a twice-a-year task here, not once. The schedule that works in a mild climate underserves a Boulder City addition. If you want to understand how we plan these connections before the build even starts, our ADU builders in Boulder City page walks through the design phase.
The Annual Maintenance Calendar, Season by Season
Here’s the rhythm we recommend for any home addition, tuned to Boulder City’s climate. Keep it on the fridge for the first two years, then you’ll know it by heart.
Spring (March-May)
- Inspect and renew exterior caulk at all new-to-old wall and roofline joints.
- Clear debris from the roof and any new gutters or drainage paths before monsoon.
- Check the foundation perimeter for new cracks or soil settling, especially where new slab meets old.
- Test the HVAC: change filters, confirm both zones hold temperature, listen for new noise at the addition’s vents.
Summer (June-August)
- After the first heavy monsoon rain, check the interior ceiling nearest the roofline seam for stains.
- Photograph the same exterior joints you shot in spring to compare movement.
- Watch for any new interior drywall cracks, particularly at door and window corners.
Fall (September-November)
- Do a full exterior seal check before the first freeze – this is your most important annual task.
- Clear leaves and debris from drainage and inspect flashing for lifting or rust.
- Confirm weatherstripping on new doors and windows seals fully; replace any that’s compressed.
Winter (December-February)
- Watch for ice dams or trapped moisture at the roofline; clear any blockages.
- Check interior humidity – desert winters run dry, and rapid swings stress wood joints.
- Note any door or window that’s suddenly sticky; the cold moves frames differently than heat.
What the 365-Day Warranty Covers (and What It Doesn’t)
The one-year mark is where homeowner responsibility begins, and it arrives quietly. A workmanship warranty covers defects in how the work was done – incorrectly installed flashing, poorly sealed joints, a connection that failed because it was assembled wrong. It does not cover normal settling movement, weather wear, or the maintenance tasks in this guide.
That distinction matters, because it’s the difference between a free second visit and a paid repair. If your caulk cracks in month four and it was properly applied, that’s maintenance – you or a handyman renews it. If water gets behind flashing that was never seated correctly, that’s a workmanship defect and it’s ours to fix. Our free second visit is built for exactly that call, and it’s offered any time a repair or element of the build fails within the guaranteed year.
Filing a Warranty Claim: Step by Step
- Photograph the problem at close range and from a step back so the location is clear.
- Note the date you first noticed it and whether it’s changing.
- Review your written price and warranty documents for the specific coverage language.
- Call with the photos ready. A contractor who sent you a photo-badged crew with a delivered name and face should answer with the same clarity – and offer the free second visit without haggling.
Under the 365-Day Done Right Promise, defects in workmanship within a full calendar year from completion get made right. That’s a written guarantee stamped on the project, not a nudge-and-a-wink. The line between warranty work and maintenance work is worth knowing before you need it, so ask at your walkthrough. If you’re still planning, our page on the room addition contractor in Boulder City explains how the guarantee is structured up front.
Normal Settling vs. a Structural Concern
Every addition settles. It’s supposed to. The question is when the settling has moved from cosmetic to consequential, and knowing that line is what keeps small issues from compounding.
Normal Settling Looks Like
- Hairline drywall cracks – thinner than a dime – in corners and at seams, appearing in the first year and then stabilizing.
- Doors and windows that stick slightly during seasonal swings and free up again.
- Small, tight caulk cracks that recur in the same place each year.
- A slight, even lip at the floor transition (under 1/8 inch).
Call a Professional When You See
- Cracks wider than 1/8 inch, or cracks that grow noticeably over a few weeks.
- Doors or windows that no longer close – not just stick, but genuinely won’t latch.
- Diagonal cracks radiating from door or window corners, especially at 45 degrees.
- Any smooth, vertical step at the floor transition, or a floor that feels bouncy.
- Water stains inside near the roofline seam, or dampness that doesn’t dry.
- Visible separation at the exterior wall where the addition meets the original house.
If any of these show up during your warranty year, call before you touch it. If you’re outside the year and the concern is purely cosmetic, a handyman handles it. If it’s structural, you’ll want the original contractor or a structural engineer, and one of the fair questions to ask is whether the connection was built to the load the plan called for. Adding a second home to your lot is a settled, rooted decision – and Boulder City’s soil and swings reward getting the maintenance right.
HVAC Integration: The Forgotten Maintenance Item
Most homeowners remember to check the caulk. Almost none remember that the HVAC system in a home addition needs its own attention. An addition that extends the original ductwork can throw off the balance of the whole house – some rooms get starved, others get flooded with air, and the system works harder to compensate. In our experience, HVAC integration is the item most often skipped in the first year, and it’s the most expensive to ignore.
What to Do Each Season
- Change filters seasonally, especially after monsoon when fine dust pulls through. A clogged filter is the cheapest HVAC repair there is.
- Balance the vents: confirm the addition holds temperature at the thermostat setting and no room overheats or freezes.
- Listen for noise: a new whistle or rattle at a supply vent can signal a duct that’s come loose in the new framing.
- Schedule a professional HVAC check once in year one. An addition changes the load calculation the original system was designed for, and a good technician confirms it’s all still within tolerance.
Recognized prefab product lines – Cover, Dvele, Boxabl, and others – come with manufacturer guidance that often overlaps with the HVAC schedule; follow both. When we work with a modular or prefab addition, the manufacturer’s maintenance manual pairs with the calendar above, and the connection points to the original home still follow the same physics. Learn how we approach the earliest of these decisions on our Sutton ADU Builders Boulder City home page.
Common Mistakes to Avoid
- Skipping the 60-day photo comparison. Cracks that look harmless in isolation look very different beside a day-30 photo. Without the comparison, you can’t tell normal settling from movement that’s getting worse before the warranty window closes.
- Treating the roofline seam as a one-time job. Sealant in Boulder City’s temperature swings ages faster than in a mild climate. Renewing it once and forgetting it means the next monsoon finds the gap first.
- Calling a maintenance issue a warranty issue, or the reverse. A homeowner who never reads the coverage language either lets a real workmanship defect lapse past the one-year mark or expects a free fix for weather wear. Know the line before you need it.
- Ignoring the HVAC balance after the build. A room that runs three degrees off in July is a duct issue, not a preference. It gets more expensive with each season it’s ignored.
- Caulking over a wet joint. Sealing before monsoon water has had time to dry traps moisture at the seam, and trapped water does the damage. Dry, then seal.
- Assuming growing cracks are ‘just settling.’ Settling stabilizes. Cracks that grow week over week are a signal, and the low-cost moment to call is now, not after drywall opens up. This is the mistake the guide exists to prevent.
- Never asking who’s coming on the warranty visit. After a security-conscious build, the last thing you want is an unfamiliar truck and an unnamed crew. Ask for the same name-and-photo-before-arrival standard you got during construction.
When to Call a Professional
Call for anything at the roofline seam you can’t inspect safely, for cracks wider than 1/8 inch or any that are growing, for water staining near the addition-to-original connection, for doors and windows that stop latching, and for HVAC that can’t hold temperature in the addition. Call before you seal over a suspect joint – a trained eye can tell the difference between a caulk crack and a failed flashing in five minutes, and that diagnosis protects your warranty. If a repair or element of the build fails within the guaranteed year, the free second visit should be offered without haggling. Sutton ADU Builders Boulder City offers free estimates in Boulder City – call (888) 296-0055.
Frequently Asked Questions
Thirty days after completion, then again at 60 and 90 days. The first three months are when the new structure does most of its settling, and photographing the same joints each time lets you tell normal movement from a concern that’s getting worse. That’s the window your 365-Day Done Right Promise is designed for.
Hairline cracks in the first year are normal settling, especially in corners and at door and window frames. Cracks wider than 1/8 inch, cracks that grow quickly, or diagonal cracks radiating from corners need a professional look. Call (888) 296-0055 for a free estimate if you’re unsure which you have.
Yes – inspect it at least twice a year here and renew the sealant before each wet season. Wide daily and seasonal temperature swings age exterior sealant faster than in a mild climate, and Boulder City’s monsoon rain finds a failed joint quickly. Roof access is dangerous, so have the roofline itself checked professionally rather than climbing it yourself.
It covers defects in workmanship for one full calendar year from project completion, with a free second visit if a repair or element of the build fails. It covers how the work was done – incorrectly seated flashing, a failed connection – not normal settling, weather wear, or missed maintenance. Call (888) 296-0055 for an exact quote and a written explanation of the coverage.
Call a structural engineer if the concern is structural – growing cracks, a floor that feels bouncy, or a visible step at the floor transition. A handyman handles cosmetic caulk and paint. Either way, photograph it and don’t seal over it. If it turns out to trace back to the original build, call us first – estimates are free.
Yes. An addition changes the load calculation the existing system was sized for, and the new ducts can throw off the balance of the whole house. Change filters after monsoon, confirm the addition holds temperature, and have a professional HVAC check in year one. Call (888) 296-0055 if you want a recommendation.
The Bottom Line
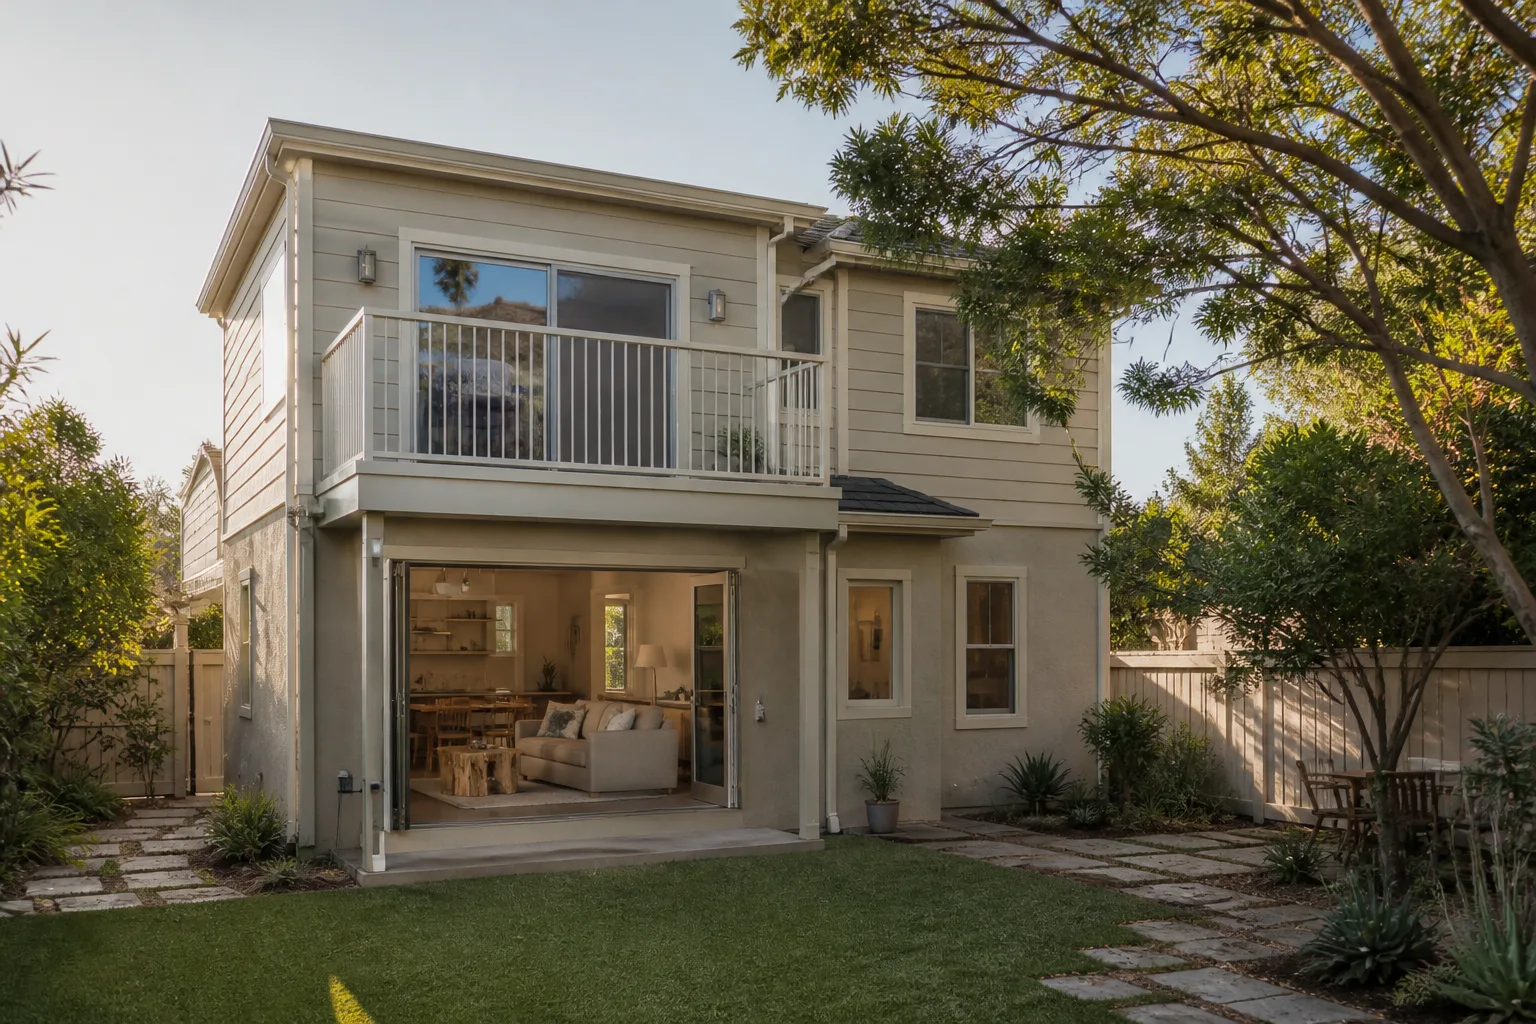
A home addition isn’t done when the crew leaves; it’s done when you know what to check and when. The short version: inspect at 30, 60, and 90 days with photos; guard the roofline seam before every wet season; renew exterior sealant twice a year in Boulder City’s swings; keep the HVAC balanced; and learn the line between warranty work and your maintenance, because the 365-Day Done Right Promise is written for exactly that first year. Watch cracks for growth, not just presence. Catch the seam early and it’s a tube of caulk. Skip it and it’s drywall.
Every Boulder City build we complete comes with a written price before work begins, a free second visit if any element fails, and a crew whose name and photo reach you before they knock. If you’re planning an addition or wondering whether a concern is structural, call Sutton ADU Builders Boulder City at (888) 296-0055 for a free estimate. You’ll get a straight answer, a written number, and a schedule you can actually follow.
Written by the team at Sutton ADU Builders Boulder City.